Updated 02/15/2022.
This is based on XWF 20.4, SR-4.
Image is from a scenario archived at Digital Corpora. The 2018 Lone Wolf Scenario was created by:
Thomas Moore, a student at George Mason University, as his final project for CRFS 780: Cloud Forensics, taught in Spring 2018 by Simson Garfinkel.
Rather than hashing all files within an evidence object, it may only be necessary to hash a single file, or multiple files. Hashing specific files may also be necessary if an algorithm different than the hashes already calculated (i.e., MD5 and SHA-1) is requested. One way is to Recover/Copy the files and compute the hash using Microsoft’s CertUtil.exe. Alternatively, the block may be defined for a single file and hashed within XWF, or multiple files may be hashed when added to a container.

Hash a Single File by Defining a Block
1. Open the target file (Right-click | Open). You may also select the file then select the File Mode tab.


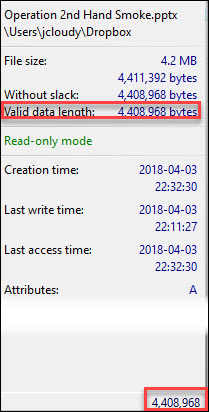
2. Select the block at the beginning and end of the file. You can verify that the length of the block is appropriately selected by comparing it to the logical file size or valid data length.
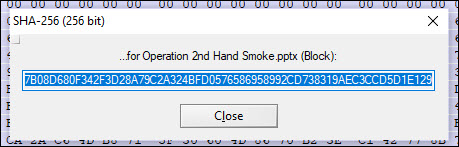
3. Go to Tools | Compute Hash (or Ctrl + F2) . Then select desired hash to compute. XWF will provide the hash of the defined block.

Hash Specific Files via RVS:
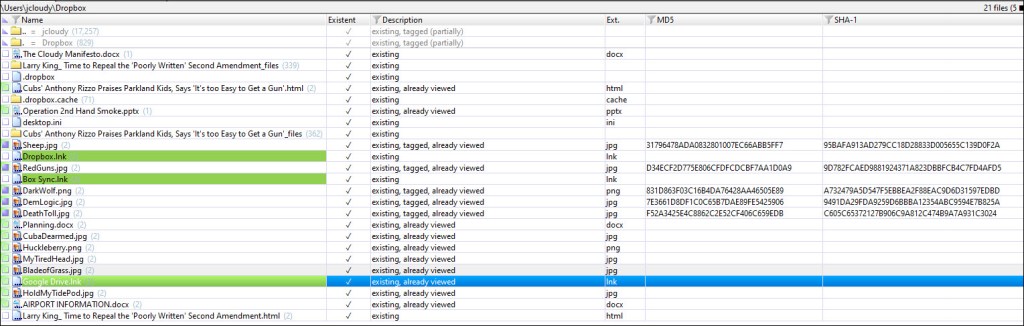
If, for example, a volume snapshot was already refined without hashes calculated, but I only want hashes for specific, multiple files.
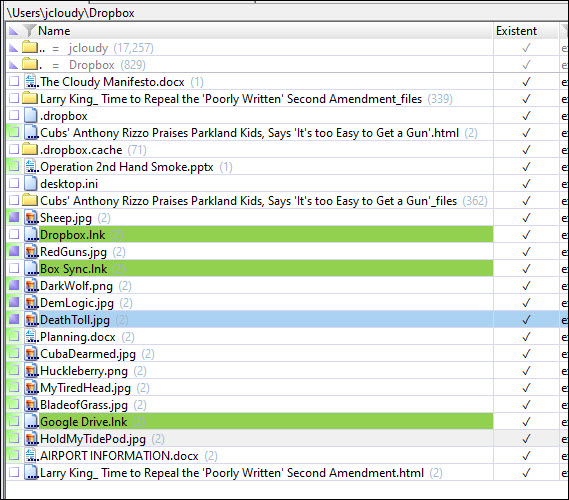
1. Tag target files. You can do this by pressing on the space bar, clicking on the square next to the desire file, or right-click then select “Tag”. Tagged files are marked with a blue square. For this example, we are tagging “to limit volume snapshot refinements to tagged files” (X-Ways Manual – Updated 2021-12-30, Page 56).
2. Refine volume snapshot to compute the desired hashes. Rather than applying “selected operations to *all* files”, select “Apply to tagged files only”.
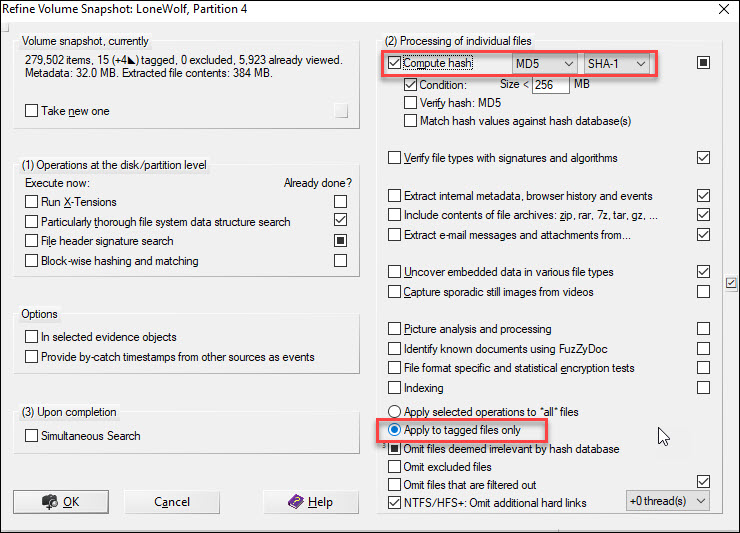
3. XWF will compute the tagged files only. The same can be achieved my selecting the files and refining the volume snapshot from the Directory Browser’s context menu.
Note that if hashes were previously calculated, the new hash selected will clear the previous hashes computed that weren’t selected if it’s a different algorithm.


To avoid that, we can add selected files to a container to hash those files separately.
Hashing Select Files in a Container:
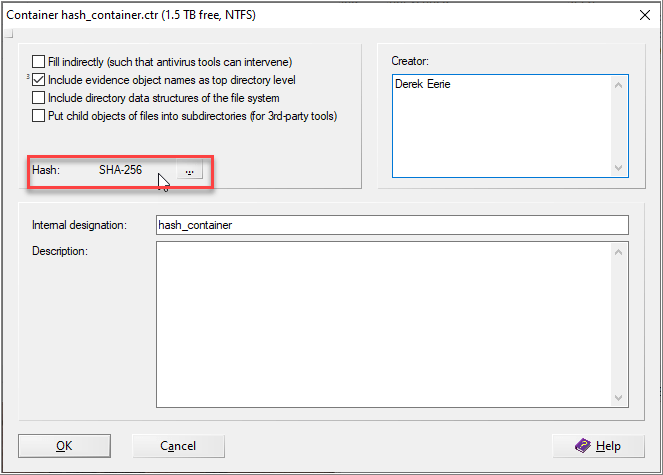
1. Specialist | Evidence File Container | New. Specify the name of the container and container options, including the hash to calculate.
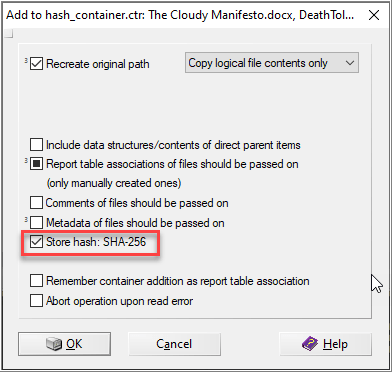
2. Select files to add to the container. Specify file specific options, including the option to store the hash selected.

3. When all desired files are added to the container, close it (Specialist | Evidence File Container | Close). You’ll have the option to convert the container from raw to an .E01 format.
4. When adding the container back to the case, the previously selected files and respective calculated hashes may be viewed, while preserving the original hashes computed.


Leave a comment